BUGS!
+(2).jpg) |
| Two finished bugs living permanently in my model. |


I
like to make lots of the one thing at a time. It makes it much easier
when I am decorating a house.With this in mind I painted lots of round
buttons and pink ? things with the gold size The good thing about the
gold size is that it stays sticky for days until it gets covered in
something like gold, foil or dust. I have not used the magic Art glue
that came with the foil as it is so old that it has separated and is now
unusable.


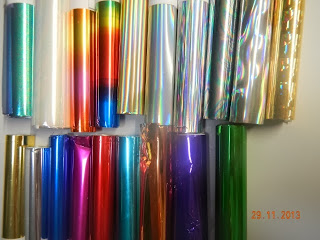
Placing the button with the sticky gold size onto the back of the foil (the side that is grey or silver in colour) the foil will then stick to the gold size. I have found that I like to mix the colours. So I 'pick' little bits of colour off the foil and onto the button. If you look at the bugs below you can see that they all have two colours, if not three, all over them. I then use the white gloves that came with the gold size to press the foil onto the sticky surface this is just to make sure it has stuck. I have also found that I can re-glue with the gold size if, for some reason, the foil did not 'take' in the first place.
One point to take notice of is to make sure that the underside and especially the edges of your 'bug' needs to be 'foiled' otherwise you will see them and spoil the look of the bug.

The
bugs above have had their 'leg's added. You can choose how many legs
and how long the legs are for your own bug but for mine I choose six on
each side. To get the 'legs' I just removed two lengths of fly screen
(the plastic kind) and allowed two to stay to hold the legs together.
You can make each leg individually if you would like. Glue these
sections of leg in place. I used the Tiger Grip glue.
To
make the heads I used dark iridescent beads cut in half and glued in
place with Tiger Grip. The beads are not perfectly cut but I found that
by gluing them in place the glue helped fill up the gap between the head
and the body. Then once that glue was dry I then 'foiled' the head and
the gap.
I used small black seed beads to make the eyes. I would have like to use large black micro beads but I didn't have any.
Once
the whole 'bug' is dry I then covered it with gloss varnish this was to
protect the foil. Once this was dry I then glued some of my 'bug's onto
my models. I am extremely pleased with them and I intend to make many
more as I now have some 'bling'. I am also sure that the foils will be
used to make lots of other creatures that will end up living in my
models.


No comments:
Post a Comment